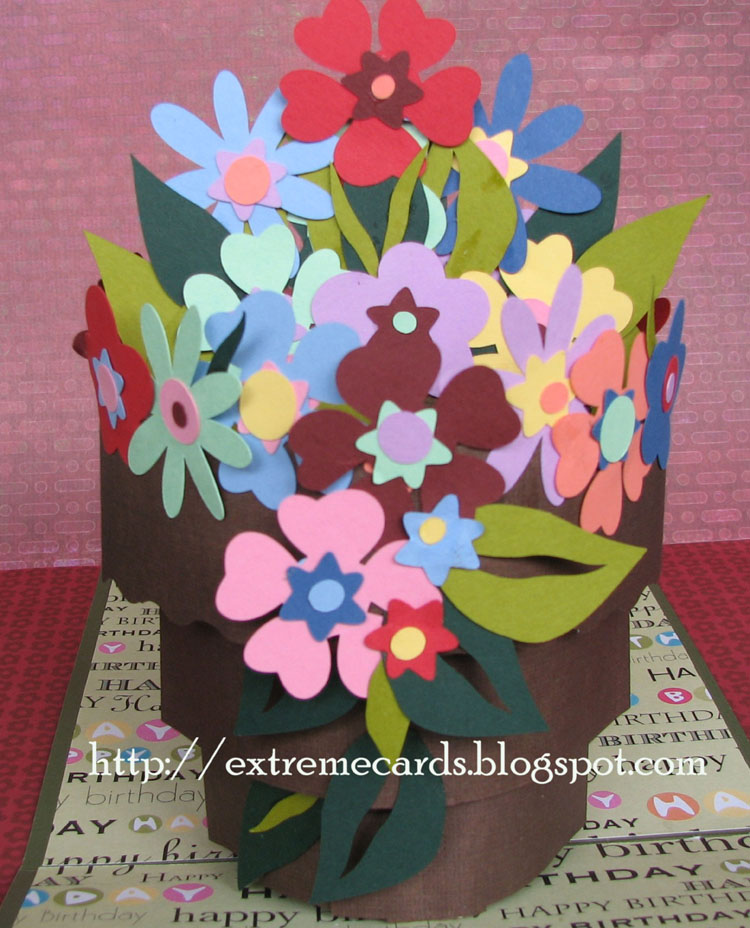
I haven't made a pop up cake in a long time. It was fun to turn it on its head to make a flowerpot.
This card idea came from Debi Adams, who designs for Sizzix / Ellison. I love how the shorter front of the card allows the flowers to show when the card is closed.

This is a challenging tutorial for experienced card crafters who aren't afraid to wing it as needed!
How to make a flowerpot pop up card from a pop up cake template
--Cut out pieces--
Download flowerpot files: PDF, DXF, SVG (how to use my SVG files in Cricut Design Space), Silhouette Studio
Files download for free; pay what you wish for the tutorial and to support this site. Suggested contribution for this project is $1.99.
Cut flowerpot from heavy card stock. Be sure to turn your paper so the grain is parallel to the long legs of the tiers.
Score crease lines.

I drew my own set of flowers and leaves, similar to those from the Sizzix Flowers & Leaf die set


Glue flower centers to large flowers. Glue centers to both sides of each flower and mix up the colors and shapes.

Cut a base card 6" x 10.5".
With the base card in portrait position, measure up from the bottom 4.5". Score horizontally and fold.
The front of the card will by 4.5" tall and the back will by 6" tall. Line inside of base card with decorative paper if you like.
--Assemble flowerpot tiers--
There are three flat-topped tiers to the flowerpot. They are assembled nested together, and glued into the fold of the card with the smallest tier nearest the fold.

Begin with the smallest tier and the medium tier. Fold the medium tier as shown.

Lay the medium tier on the smallest tier, matching the cut edges (shown in green) of the medium tier legs with the center of the smallest tier.
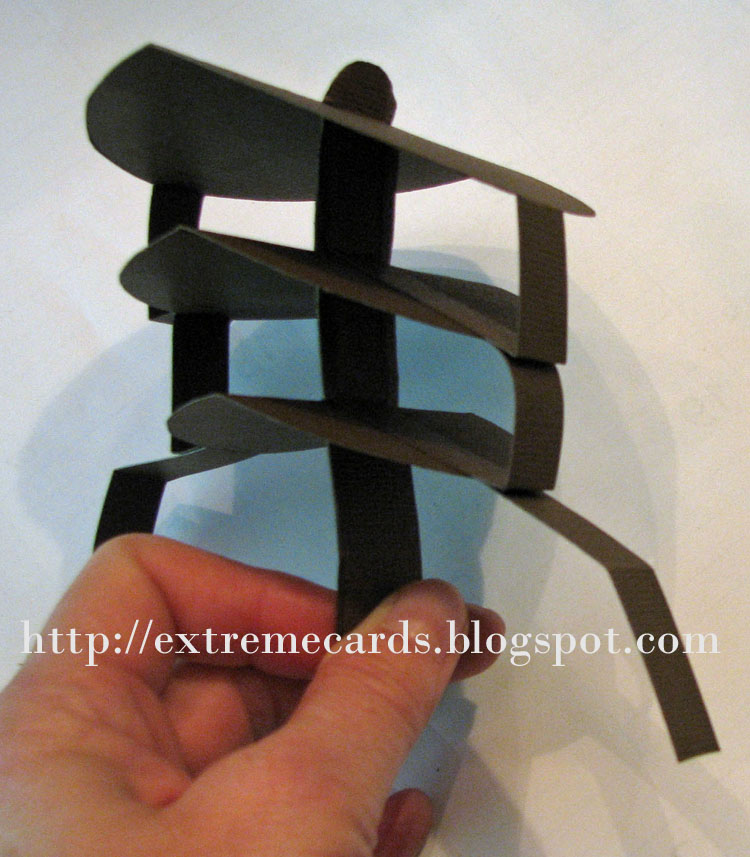
Spread glue from the cut edge of the leg to the line where the leg crosses the outside edge of the smallest tier (shown in yellow). Do not spread glue all the way up to the first fold line (shown in red).

Close the smallest tier around the leg. Flip the whole thing over, open the smallest tier up and glue the other leg the same way. Let this dry a bit. When you open it it will look like the photo below.

Next, glue the largest tier to the medium tier. I open the medium tier flat, dry fit the legs of the largest tier to it, mark the glue lines, and then glue.
Fold in the scored flanges on the edges of the center post.

Starting with the smallest tier, slide the center post up through the center cut of each tier. Unfold the flanges.
Flatten the piece.
Open out the feet of the center post.

Fold up each leg of the smallest tier and glue one to each foot of the center post.


--Glue pop up to base card--
Open your base card flat. Mark center point of the center fold.
Open up the flowerpot piece until the tiers are flat. The feet of the smallest tier form a flat bottom to the flowerpot.
Glue the flat bottom of the flowerpot into the card base, matching centers creases.


--Attach flowerpot tier sides--
You will need three strips of lightweight paper. Size? Well, that's a good question....I cut the strip for the smallest tier 1" wide, and the medium one 1.25" wide, and the top one maybe 1.75" because I trimmed some of the bottom off with decorative edge scissors and I wanted the top edge of the strip to be above the "dirt." Read sidenote below, before cutting your strips! Length? Long enough to wrap around each tier with some overlap.
Sidenote:When you make a pop up cake, you generally cut the width of the strips the same as the height of the tier. Visually, this gives you distinct cake layers. With the flowerpot, however, I think it looks better to cut the top two a little wider, so they slide over the tier below and give the illusion of a continuous side to the pot. Unfortunately, I had a little trouble with some of the edges catching as the card unfolded. You'll see I came up with a fix, but you may want to cut your medium tier strip and top tier strip a little wider than I did. I suggest cutting them wider and dry fitting, then trimming to your satisfaction before gluing.

I prefer double sided tape to affix the strips to the tier feet, but you can use glue.
Start with the bottom strip. Affix double sided tape to the two uprights (feet) on the sides of the tier. I stick the (approximate) center of the paper strip to one upright, then curl one end around and stick it to the other upright. Curl the other side of the paper around, overlap, trim and affix.
You can see that I wrapped the strip a bit loosely, so there is a gap between the tier and the strip all the way around. The popup works better with a bit of ease here. On a cake this would be visible, but it's hidden on the flowerpot!
Now affix the medium tier strip. The top edge of the strip aligns with the medium tier circle. This strip can't go any higher as it bumps into the bottom side of the feet of the largest tier. The bottom edge of the strip will hang down over the smallest tier.
Lastly, attach the top strip. Mine hangs over the medium tier and has an edge above the top tier so the "dirt" does not come all the way to the top of the pot. I'm not sure I love this, as the back side of my paper shows (and it's white.)
I glued a rounded off strip of card stock to the top of the center post to support a large center arrangement of flowers.

Ever so slowly and carefully close the card, collapsing the pop up mechanism and creating the two side folds on each of the tier strips.
--Adding the flowers--

This part is all personal preference but here are my hints.
Spend some time arranging your flowers to make an array that will be pleasing both when the card is open and when it is shut.
The flowers on the front of the pot (the front of the card is the shorter side) will be the most visible.
They will form a straight line across the front edge of the card.
Don't make the center arrangement too high or it will look odd when the card is closed.

Do not glue any flowers across the fold lines on the sides of the tiers or your card will no longer close!

If your tiers hang up on each other as you try to close the card, glue a leaf to the underside of the problem place to make a smooth wedge between the tiers.


I had to do that on both the front and the back of the pot.
Use a belly band or ribbon to hold the card shut.
Extreme Cards and Papercrafting: pop up cards, movable and mechanical cards, digital crafts and unusual papercrafts.